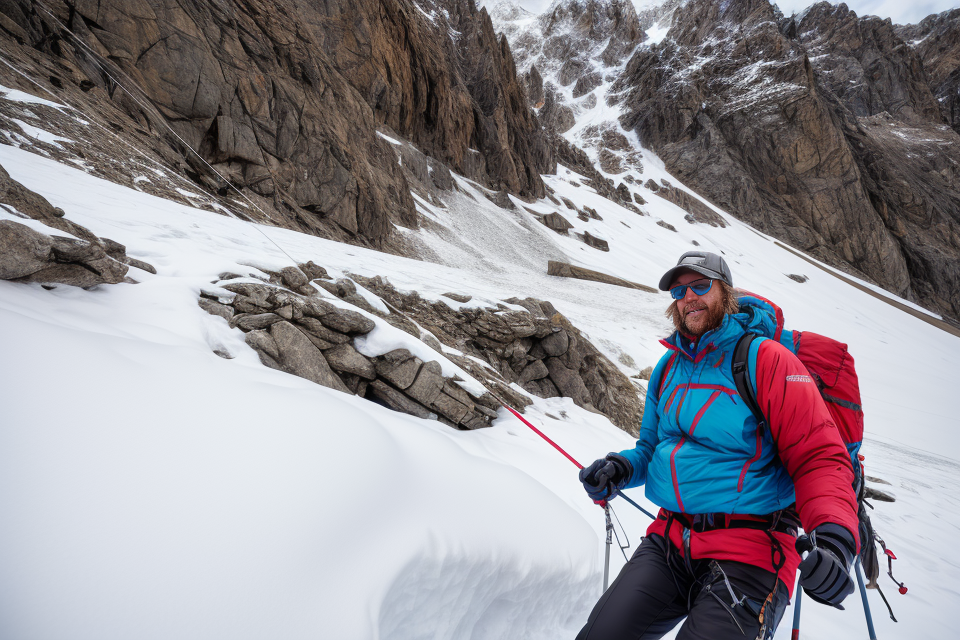
An ice axe is an essential tool for any outdoor enthusiast who ventures into snowy or icy terrain. Whether you’re a seasoned mountaineer or a beginner backpacker, understanding how and when to use an ice axe is crucial for your safety and success in the great outdoors. In this comprehensive guide, we’ll explore the ins and outs of ice axes, from their various types and features to proper techniques for climbing, descending, and self-arresting. So, buckle up and get ready to learn everything you need to know about using an ice axe in the wild.
Understanding the Basics of an Ice Axe
What is an Ice Axe?
An ice axe is a specialized tool used by mountaineers, skiers, and other outdoor enthusiasts for various purposes, such as providing support while climbing steep terrain, assisting with descents, and acting as an anchor in snow and ice.
Parts of an Ice Axe
A typical ice axe consists of the following components:
- Head: The head of an ice axe is typically made of steel or aluminum and is designed to penetrate snow, ice, and other firm alpine terrain. It features a sharp spike, which is used for penetrating snow and ice, and an adze, which is used for chopping steps and anchoring the axe in snow.
- Shaft: The shaft of an ice axe is typically made of aluminum or carbon fiber and provides the length and strength needed for various climbing and descending techniques.
- Handle: The handle of an ice axe is usually made of wood, metal, or a combination of both. It provides a comfortable grip and allows the user to apply force with their hands and arms.
- Pick: The pick of an ice axe is the sharp edge located at the top of the head, which is used for cutting steps and self-arresting (stopping a fall) in glacial ice.
Ice Axe Types
There are several types of ice axes, each designed for specific climbing and skiing techniques:
- Single or double pick: Single pick axes have a single sharp edge for cutting steps, while double pick axes have two sharp edges for better support and stability in steep terrain.
- French: French ice axes have a spike and an adze on the same side of the head, making them well-suited for climbing and chopping steps on steep snow and ice.
- Swiss: Swiss ice axes have a spike and an adze on opposite sides of the head, making them well-suited for both climbing and walking on steep terrain.
- Hammer: Hammer axes have an additional hammering tool at the back of the head, which is used for breaking and clearing snow and ice.
In summary, an ice axe is a crucial tool for outdoor enthusiasts who venture into snow and ice environments. It is essential to understand the different parts and types of ice axes to choose the right one for specific climbing and skiing techniques.
Choosing the Right Ice Axe
Factors to Consider
When selecting an ice axe, several factors must be considered to ensure that it meets your needs and provides the required level of support and safety during your outdoor activities. Here are some essential factors to consider when choosing the right ice axe:
- Intended Use: The primary factor to consider when selecting an ice axe is its intended use. Are you planning to use it for mountaineering, ice climbing, or general hiking? Each activity requires a different type of ice axe with specific features and specifications.
- Size and Weight: The size and weight of the ice axe are also crucial factors to consider. A heavier ice axe may provide more support, but it may also be more difficult to carry and use for extended periods. On the other hand, a lighter ice axe may be more convenient to carry, but it may not provide the same level of support as a heavier one.
- Pick Quality: The quality of the pick is another critical factor to consider. A good pick should be durable, strong, and able to penetrate ice and snow easily. The pick should also be able to provide a secure grip on various surfaces, including ice, snow, and rock.
- Adze: The adze is another essential component of an ice axe. It is used for digging snow steps, chopping ice, and breaking trail. The adze should be strong and sharp to perform these tasks effectively.
- Shaft: The shaft of the ice axe should be sturdy and comfortable to hold. It should also be long enough to provide the required level of support and stability during use.
Ice Axe Selection Chart
Here is a selection chart that can help you choose the right ice axe based on your intended use and requirements:
| Intended Use | Ice Axe Type | Features to Look For |
|---|---|---|
| General Hiking | Lightweight | Compact, lightweight, and easy to carry. |
| Mountaineering | Alpine | Adjustable, durable, and provides support in various terrain. |
| Ice Climbing | Ice | Pick designed for ice, adze for chopping and digging. |
By considering these factors and referring to the selection chart, you can choose the right ice axe for your outdoor activities and ensure your safety and enjoyment in the great outdoors.
Basic Techniques for Using an Ice Axe
Using an ice axe is a fundamental skill for any outdoor enthusiast who plans to venture into icy or snowy terrain. Here are some basic techniques that you should master before heading out into the wilderness:
Chopping Steps
Chopping steps is a basic technique used to gain purchase on ice or snow. It involves driving the ice axe into the snow or ice, placing the adze (the flat face of the axe) on the surface, and then chopping the axe into the surface to create a solid foothold. The steps are usually kicked in with the other foot as the axe is chopped. This technique is often used when climbing steep icy slopes or when traversing a glacier.
Self-Arrest Technique
The self-arrest technique is used to stop a fall on steep ice or snow slopes. It involves planting the ice axe into the snow or ice, then using the adze to dig into the surface and arrest the fall. To perform a self-arrest, first kick the axe into the snow or ice at a 45-degree angle, then bring the other foot up to the axe and place it next to the blade. Push the handle of the axe into the snow or ice with both hands, then dig the adze into the surface to arrest the fall.
It’s important to practice these techniques in a controlled environment before attempting them in the field. Additionally, it’s essential to choose the right ice axe for the specific conditions you’ll be facing, as different types of ice axes are designed for different types of terrain and activities. With the right equipment and knowledge, using an ice axe can be a safe and enjoyable way to explore the outdoors in winter conditions.
Ice Axe Safety Tips
Choosing the Right Location for Ice Climbing
Selecting the right location for ice climbing is crucial for a safe and enjoyable experience. Here are some key factors to consider when choosing a location:
- Climbing Route: Choose a route that is within your skill level and experience. If you are a beginner, it is best to start with easier routes to build your skills and confidence. More experienced climbers can opt for more challenging routes.
- Ice Conditions: Check the ice conditions before starting your climb. Look for signs of instability, such as hollow or rotten ice, and avoid climbing on ice that is too soft or too hard. It is also important to check the weather forecast and ensure that the ice is not subject to warm temperatures or rain.
- Accessibility: Make sure the location is accessible by foot or with the help of a guide. Avoid areas that are difficult to reach or require specialized equipment.
- Avalanche Risks: Be aware of the avalanche risks in the area and avoid climbing in areas prone to avalanches.
- Equipment Availability: Ensure that you have access to the necessary equipment, such as an ice axe, crampons, and helmet, before starting your climb.
- Climbing Partner: Climb with a partner who is experienced and knowledgeable about ice climbing. This will help ensure your safety and provide support in case of an emergency.
By considering these factors, you can choose a location that is safe and suitable for your ice climbing adventure.
Maintaining Control and Balance
Proper handling of an ice axe is crucial to ensuring safety while using it. One of the most important aspects of ice axe use is maintaining control and balance. Here are some tips to help you achieve this:
- Keep your hand on the shaft at all times: This is an essential rule when using an ice axe. Keeping your hand on the shaft allows you to have better control over the axe and to react quickly to any changes in the terrain or conditions.
- Keep your weight on the uphill foot: When climbing uphill, it is important to distribute your weight evenly between both feet. Keeping your weight on your uphill foot allows you to maintain better balance and prevents you from sliding downhill.
- Use the pick for support: The pick of the ice axe is designed to penetrate ice and provide support. When climbing, use the pick to test the strength of the ice and snow and to find secure footing.
- Watch your balance: When climbing, always be aware of your balance and adjust your position as needed. Make sure to keep your weight centered over the axe and avoid leaning too far forward or backward.
- Be aware of your surroundings: Always be aware of the terrain and conditions around you. Be prepared for changes in the slope, wind, or temperature, and adjust your climbing technique accordingly.
By following these tips, you can maintain control and balance while using an ice axe, which will help ensure your safety while climbing in the mountains.
Dealing with Sudden Falling
In the unfortunate event of a sudden fall while using an ice axe, it is crucial to know how to handle the situation to prevent injury. Here are some tips on dealing with sudden falling while using an ice axe:
- Stay Calm: It is essential to remain calm and composed during a fall. Panicking can lead to a lack of proper technique and can result in injury.
- Face the Direction of Fall: If you are falling forward, make sure to face the direction of the fall and position your ice axe in front of you. This will help you slow down the fall and lessen the impact when you hit the ground.
- Extend Your Arms: As you fall, extend your arms in front of you and use your ice axe to brake your fall. Keep your arms straight and your weight on the shaft of the ice axe.
- Avoid Impact Zones: Try to avoid landing in areas with hidden crevasses, rocks, or other hazards.
- Use the Self-Arrest Technique: If you have enough time and space, use the self-arrest technique to stop your fall. This involves planting the pick of your ice axe into the snow and using the spike to stop your descent.
- Evaluate Your Situation: After you have come to a stop, evaluate your situation to determine if you need to call for help or if you can continue on your way.
By following these tips, you can reduce the risk of injury when dealing with sudden falls while using an ice axe. Remember to always wear appropriate safety gear and be aware of your surroundings to prevent accidents.
Proper Footwear and Clothing
When using an ice axe, it is essential to wear the right footwear and clothing to ensure safety and comfort. Here are some guidelines to follow:
- Wear sturdy, waterproof boots with good ankle support to prevent ankle injuries.
- Choose boots with a good grip on the sole to prevent slips and falls on ice.
- Wear insulated, waterproof gloves to protect your hands from the cold and to maintain a good grip on the ice axe.
- Wear layers of clothing, including a base layer, mid-layer, and outer layer. The base layer should be made of moisture-wicking material to keep you dry, while the mid-layer should be insulated to keep you warm. The outer layer should be waterproof and breathable to protect you from the elements.
- Wear a hat and scarf to prevent heat loss from your head and neck.
- Wear sunglasses or goggles to protect your eyes from the sun and wind.
- Wear a helmet to protect your head from falling ice or debris.
By following these guidelines, you can ensure that you are properly dressed and equipped to use an ice axe safely and comfortably in various outdoor conditions.
Importance of Practice and Familiarization
When it comes to using an ice axe, it is crucial to understand the importance of practice and familiarization. As an outdoor enthusiast, you must be well-versed in the proper handling and use of an ice axe to ensure your safety and the safety of those around you.
Practice with Dry Tooling
Dry tooling is a technique used to practice ice climbing without the use of real ice. This method allows you to practice different techniques, such as placing and removing ice screws, without the risk of falling. By practicing dry tooling, you can improve your skills and become more comfortable with your ice axe.
Familiarize Yourself with Different Techniques
It is essential to be familiar with different ice climbing techniques, such as the Swiss stop, French stop, and ice screw placement. Each technique has its own unique advantages and disadvantages, and knowing when to use them can make a significant difference in your safety and efficiency.
Practice Self-Arrest
Self-arrest is the most critical technique to master when using an ice axe. It involves stopping a fall by digging the pick of the ice axe into the ice. To practice self-arrest, find a steep slope or a snowbank and simulate a fall. As you fall, use your ice axe to stop yourself by driving the pick into the ice.
Get Used to Carrying an Ice Axe
Finally, it is crucial to get used to carrying an ice axe. This might seem like a simple task, but it is essential to ensure that you can access your ice axe quickly and efficiently in case of an emergency. Practice carrying your ice axe in different positions, such as on your back or in your hand, to become comfortable with it.
In conclusion, the importance of practice and familiarization cannot be overstated when it comes to using an ice axe. By practicing dry tooling, familiarizing yourself with different techniques, practicing self-arrest, and getting used to carrying an ice axe, you can improve your skills and ensure your safety while out in the wilderness.
Advanced Techniques for Using an Ice Axe
Front-Pointing Technique
The front-pointing technique is a crucial skill for climbers who venture onto steep ice and mixed terrain. This technique involves using the pick of the ice axe to drive it into the ice, while the shaft of the axe is held in the lower hand.
To execute the front-pointing technique correctly, follow these steps:
- Begin by holding the ice axe with the pick facing down and the shaft in the lower hand.
- Step forward with the opposite foot and place it on the same level as the supporting foot.
- Push the supporting foot against the ice, and drive the pick of the ice axe into the ice above the foot.
- Shift the weight of the body onto the foot that is now supporting the axe.
- Pull up with the upper hand, using the shaft of the axe to pull the axe out of the ice.
- Repeat the process with the opposite arm and leg.
It is important to keep the body upright and facing downhill while front-pointing, as this technique relies on the pick of the ice axe being driven into the ice for support. It is also essential to keep the upper hand close to the axe shaft to maximize the leverage and control of the tool.
Front-pointing technique is commonly used in steep snow and ice climbing, where the pick of the ice axe is used to cut into the ice, and the shaft is used to brace against the ice for support. It is also used in mixed climbing, where the axe is used to protect against falls on rock or ice.
Overall, mastering the front-pointing technique is crucial for climbers who want to tackle steep and challenging terrain, and it is a valuable skill to have in one’s climbing arsenal.
Front-Pointing with an Ice Axe
When navigating steep, icy terrain, front-pointing with an ice axe is a crucial technique for maintaining balance and control. Front-pointing involves placing the pick of the ice axe directly in front of the foot, and using it to grip the ice for support.
To perform front-pointing with an ice axe, follow these steps:
- Plant the ice axe: Insert the spike of the ice axe into the ice, in front of the foot that will be moving forward. Make sure the pick is perpendicular to the ice surface.
- Shift weight: Shift your weight onto the foot that is on top of the ice axe.
- Pull up: Pull up with the hand holding the ice axe shaft, while keeping the elbow tucked close to the body.
- Step up: Move the foot that was on top of the ice axe up and over the ice axe, and place it in front of the other foot.
- Repeat: Repeat the process with the other foot, and continue front-pointing up the slope.
It’s important to keep the knees bent and the back straight while front-pointing, as this will help maintain balance and control. It’s also important to keep the ice axe in the correct position, with the pick facing directly downhill.
Front-pointing is a challenging technique that requires practice and experience. It’s important to start with a gentle slope and gradually work up to more difficult terrain. It’s also important to wear appropriate footwear and use a helmet to protect against falls.
Overall, front-pointing with an ice axe is a critical technique for navigating steep, icy terrain. With practice and experience, it can be mastered and used to safely climb and descend even the most challenging mountain slopes.
Rappelling with an Ice Axe
Rappelling with an ice axe is a technique used by mountaineers and climbers to descend steep and icy terrain. This method is particularly useful when the ground is too steep or icy to walk down safely. Rappelling with an ice axe requires a high level of skill and experience, and it should only be attempted by experienced climbers.
To rappel with an ice axe, follow these steps:
- Find a suitable location: Look for a snow or ice-covered slope that is steep enough to require a rappelling descent but not so steep that it is dangerous.
- Choose a starting point: Find a safe starting point for your rappel. This should be a stable location where you can easily attach your ice axe and begin your descent.
- Set up the rappel: Attach your ice axe to your harness using a Figure 8 knot. This will serve as your anchor point. Make sure the ice axe is positioned correctly, with the pick facing downhill and the shaft pointing away from your body.
- Secure your rope: Attach your rope to your ice axe using a Clove Hitch knot. Make sure the rope is tight against the ice axe and the knot is secure.
- Begin the rappel: Start your rappel by holding the rope with one hand and leaning back slightly. Use your ice axe as a brake by holding the shaft with your other hand. Control your descent by applying pressure to the rope with your hand.
- Descend slowly: Move down the slope slowly and steadily, keeping your ice axe in front of you for balance. Use your feet to kick steps in the snow or ice as you descend.
- Disassemble the rappel: Once you reach the bottom of the slope, disassemble your rappel by removing the rope from your ice axe and coiling it up for storage.
It is important to note that rappelling with an ice axe is a dangerous activity and should only be attempted by experienced climbers. Always use proper safety precautions, such as wearing a helmet and carrying a backup rescue device, and never attempt to rappel on unstable or steep terrain.
Kicking Steps with an Ice Axe
Kicking steps with an ice axe is an advanced technique that allows climbers to make progress on steep, icy terrain. This technique involves using the ice axe as a tool to dig into the ice and create steps, rather than just for support. Here are the steps to properly kick steps with an ice axe:
- Start by standing in front of the climb with your ice axe in your uphill hand.
- Shift your weight onto your uphill foot and brace your ice axe.
- Drive the pick of your ice axe into the ice above your foot, then kick your heel downward into the step you’ve created.
- Pull up on the handle of your ice axe with your other hand, using it to pull yourself up to the new step.
- Repeat the process for each step, making sure to use the pick of your ice axe to create a solid foothold each time.
It’s important to note that kicking steps requires strong leg muscles and proper technique. It’s also important to use the correct ice axe placement and to pay attention to the quality of the ice. It’s always a good idea to practice this technique on easy terrain before attempting it on more difficult climbs.
Ice Axe Care and Maintenance
Choosing the Right Storage Location
Proper storage is crucial to ensure that your ice axe remains in good condition and ready for your next outdoor adventure. Here are some tips for choosing the right storage location for your ice axe:
- Away from direct sunlight: Direct sunlight can cause the metal components of your ice axe to rust and corrode, so it’s best to store it in a shaded area or in a location that doesn’t receive direct sunlight.
- Away from moisture: Moisture can cause the handle and other parts of your ice axe to rot and degrade, so it’s important to store it in a dry location. If possible, store it in a sealed container or cover it with a dry cloth to prevent moisture from accumulating.
- In a secure location: It’s important to store your ice axe in a secure location to prevent it from being damaged or stolen. If you have a dedicated tool storage area, such as a tool shed or garage, that’s a great option. Otherwise, you can store it in a closet or on a shelf, but make sure it’s out of reach of children and pets.
- In a location that’s easy to access: It’s important to store your ice axe in a location that’s easy to access so you can grab it quickly when you need it. However, make sure it’s not in a location that’s in the way or that will be damaged by the weight or size of the ice axe.
By following these tips, you can ensure that your ice axe is stored in a safe and secure location that’s easy to access when you need it.
Cleaning and Drying the Ice Axe
After each use, it is essential to clean and dry the ice axe properly to prevent corrosion and ensure it remains in good condition for future outings. Here’s a step-by-step guide on how to clean and dry your ice axe:
Step 1: Remove any snow or ice buildup
Start by removing any snow or ice buildup from the shaft, head, and spike of the ice axe. Use a brush or your gloved hand to gently brush away any loose snow or ice.
Step 2: Disassemble the ice axe
If your ice axe is adjustable, disassemble it by removing the pick and shaft from the handle. This will allow you to clean and dry each component separately.
Step 3: Clean the ice axe components
Use a mild soap and warm water to clean the components of the ice axe. Gently scrub the shaft, head, and spike with a soft brush, paying particular attention to any dirt or debris that may have accumulated in crevices. Rinse the components thoroughly with clean water.
Step 4: Dry the ice axe
Once the components are clean, allow them to air dry completely before reassembling the ice axe. Avoid using heat sources such as hairdryers or space heaters, as this can cause damage to the metal. If you’re in a hurry to dry the ice axe, you can place it in a warm, dry location with good ventilation.
Step 5: Inspect the ice axe
After the ice axe has dried completely, inspect it for any signs of damage or wear. If you notice any rust or other issues, clean and treat the ice axe according to the manufacturer’s instructions.
By following these steps, you can ensure that your ice axe remains in good condition and ready for your next outdoor adventure.
Sharpening the Ice Axe
Properly sharpening your ice axe is crucial for ensuring its effectiveness and longevity. Here are the steps to follow:
- Identify the Type of Grind
There are two main types of grinds for ice axes: dry-tooling and mixed-terrain. Dry-tooling grinds are typically more aggressive, while mixed-terrain grinds are more versatile. - Select the Right Sharpening Tool
There are several options for sharpening ice axes, including grinders, bench stones, and sharpening files. Choose a tool that is suitable for your grind type and experience level. - Inspect the Blade
Before sharpening, inspect the bla of the ice axe for any damage or wear. If the bla is significantly damaged, it may need to be replaced. - Establish the Bevel
To establish the bevel, hold the ice axe blade against the sharpening tool at a 15-20 degree angle and draw the bla across the tool in one direction. - Set the Hollow Ground
Set the hollow ground by holding the ice axe blade against the sharpening tool at a 90-degree angle and drawing the bla across the tool in the opposite direction of the bevel. - Finish the Edge
Finish the edge by using a fine grit stone or file to remove any burrs and hone the edge to a sharp point. - Repeat the Process
Repeat the sharpening process on the opposite side of the blade to ensure even wear and a sharp edge.
Remember to regularly inspect and maintain your ice axe to ensure it is always ready for use. Proper sharpening will help extend the life of your ice axe and improve its performance in a variety of conditions.
Replacing Worn Parts
When it comes to maintaining your ice axe, replacing worn parts is an essential aspect of keeping it in good working condition. Here are some guidelines to help you identify when parts need to be replaced and how to do it:
Identifying Worn Parts
- Check the pick: The pick is the front part of the ice axe that is designed to penetrate ice and snow. Over time, the pick can become dull or worn, making it less effective at biting into the snow and ice.
- Inspect the shaft: The shaft is the long, straight part of the ice axe that connects the head to the handle. If the shaft is bent or damaged, it can affect the performance of the ice axe.
- Examine the handle: The handle is where you hold the ice axe, and it should be comfortable and secure. If the handle is cracked or damaged, it may need to be replaced.
Replacing Worn Parts
- Replacing the pick: If the pick is dull or worn, you can replace it with a new one. The pick is typically attached to the head of the ice axe, and replacing it usually involves removing the old pick and attaching a new one using screws or bolts.
- Replacing the shaft: If the shaft is bent or damaged, it may need to be replaced. This can be a more complex process that requires disassembling the ice axe and removing the old shaft before attaching a new one.
- Replacing the handle: If the handle is cracked or damaged, you can replace it with a new one. This typically involves removing the old handle and attaching a new one using screws or bolts.
By regularly inspecting and replacing worn parts, you can ensure that your ice axe remains in good working condition and continues to provide reliable support and protection in the outdoors.
Frequently Asked Questions about Using an Ice Axe
What are the different types of ice axes?
When it comes to ice axes, there are several different types that cater to different purposes and climbing styles. Here are some of the most common types of ice axes:
- Single Fixed Picks: These ice axes have a single, curved pick that is designed for vertical ice and mixed climbing. The pick is fixed in place and cannot be adjusted. These axes are typically lightweight and are used by climbers who are experienced in vertical ice climbing.
- Pick and Flail: This type of ice axe has a curved pick for vertical ice climbing and a hammer head for digging into snow and ice. The pick can be fixed or adjustable, and the hammer head is typically on the opposite end of the handle. This type of ice axe is ideal for mixed climbing, where the terrain includes both ice and snow.
- Piolet and Piolet Canne: These ice axes are used for technical alpine climbing and are typically heavier than other types of ice axes. The piolet has a straight shaft and a curved pick, while the piolet canne has a straight shaft and a pointed pick. Both types of ice axes have a hammer head on the opposite end of the handle for hammering in pitons.
- Dynamo: This type of ice axe is similar to a pick and flail, but with a more aggressive pick and a longer shaft. The dynamo is designed for steep, technical ice climbing and can also be used for mixed climbing.
- Voile Axe: This type of ice axe is designed for alpine climbing and ski mountaineering. It has a lightweight, curved pick and a small adze for chopping steps in snow and ice. The shaft is typically longer than other types of ice axes, making it easier to use while wearing crampons.
When choosing an ice axe, it’s important to consider the type of climbing you’ll be doing and the conditions you’ll be facing. Different types of ice axes are designed for different types of terrain and climbing styles, so it’s important to choose the right tool for the job.
How do I choose the right ice axe for my needs?
Choosing the right ice axe is crucial for ensuring your safety and comfort while outdoor climbing. There are several factors to consider when selecting an ice axe, including the type of terrain you will be climbing, the length of your climb, and your personal climbing style. Here are some key points to keep in mind when choosing an ice axe:
- Consider the terrain: Different ice axes are designed for different types of terrain. For example, if you will be climbing steep, technical routes, you will need an ice axe with a longer shaft and a more aggressive pick. If you will be climbing more moderate routes, a shorter ice axe with a less aggressive pick may be more suitable.
- Think about the length of your climb: The length of your climb will also impact your choice of ice axe. If you are planning a multi-day climb, you will need an ice axe that is comfortable to carry on your pack for extended periods of time. On the other hand, if you are only climbing for a few hours, a shorter ice axe may be more convenient.
- Choose an ice axe that fits your climbing style: Your personal climbing style will also play a role in choosing the right ice axe. If you are a more aggressive climber, you may prefer an ice axe with a more aggressive pick and a more sturdy construction. If you are a more conservative climber, you may prefer an ice axe with a more gentle pick and a lighter weight.
- Pay attention to the material: The material of the ice axe is also an important consideration. Carbon fiber ice axes are lightweight and durable, but may not be as strong as traditional aluminum ice axes. Aluminum ice axes are heavier, but offer more strength and durability.
- Consider the cost: Ice axes can range in price from a few hundred dollars to several thousand dollars. Consider your budget when choosing an ice axe, but keep in mind that a higher-quality ice axe may offer better performance and safety.
By taking these factors into account, you can choose the right ice axe for your needs and enjoy a safe and enjoyable climbing experience.
What are the basic techniques for using an ice axe?
An ice axe is a crucial tool for climbers, mountaineers, and hikers who venture into snowy or icy terrain. Knowing how to use an ice axe properly can mean the difference between a safe and enjoyable outing and a dangerous or even life-threatening situation. Here are some basic techniques for using an ice axe:
- Choosing the right ice axe: There are different types of ice axes designed for different purposes, such as alpine climbing, ice climbing, and general hiking. Choose an ice axe that is appropriate for the type of terrain you will be traversing and the level of difficulty of the climb.
- Carrying the ice axe: When carrying an ice axe, it should be held with the head pointing down and the shaft resting on the ground. The axe should be carried with the spike facing down and the adze facing up.
- Planting the ice axe: To plant the ice axe, hold it with both hands and position the pick and spike at the desired location. Step on the handle with one foot and twist the handle with the other foot to drive the pick and spike into the ice or snow.
- Self-arrest: Self-arrest is the technique of using the ice axe to stop a fall. To perform a self-arrest, plant the ice axe in the snow or ice with the pick pointing down and the spike pointing up. As you fall, the pick will dig into the snow or ice, creating a brake that will slow your descent.
- Belaying: Belaying is the technique of securing a climber with a rope. To belay a climber using an ice axe, position the ice axe with the pick pointing up and the spike pointing down. The climber can then secure the rope to the axe and use it to ascend or descend the slope.
- Resting with the ice axe: When resting, position the ice axe with the spike pointing down and the adze pointing up. Use the adze to dig into the snow or ice and support your weight, while keeping the pick free to self-arrest if necessary.
These are just a few basic techniques for using an ice axe. It is important to practice and perfect these techniques before venturing into snowy or icy terrain, and to always use caution and follow proper safety protocols.
How do I practice self-arrest with an ice axe?
Mastering the art of self-arrest is a critical skill for any alpinist or mountaineer. Self-arrest involves using an ice axe to stop a fall, and it is an essential skill to know how to perform in case of an emergency. Here are some steps to follow when practicing self-arrest with an ice axe:
- Find a suitable location: Look for a steep, snow-covered slope with a consistent pitch. Ideally, the slope should be between 25 and 45 degrees. The location should also be free from any obstacles or hazards.
- Put on your climbing harness: Before starting the exercise, make sure you have your climbing harness on. This will help distribute the force of a fall, keeping you safe.
- Choose the right stance: Stand with your feet shoulder-width apart, facing downhill. Keep your weight on the uphill side of your feet, with your knees slightly bent. Your arms should be relaxed and extended downhill.
- Hold the ice axe correctly: Grip the ice axe with your dominant hand on the shaft and your non-dominant hand on the head. The head should be pointing uphill, with the pick facing downhill.
- Practice stopping a fall: Begin by standing still and pretending that you are starting to slip. As you start to slide, plant the ice axe into the snow, using the pick to dig into the slope. Pull up on the handle of the ice axe with your dominant hand while pushing down with your non-dominant hand. This motion will stop your fall.
- Practice different scenarios: Practice self-arrest in different scenarios, such as stopping a fall while moving uphill or downhill. You should also practice self-arrest in various snow conditions, including soft and hard snow.
- Get feedback: Have a partner watch you practice self-arrest and provide feedback on your technique. They can help you identify any mistakes or areas where you need improvement.
Remember, practice makes perfect. The more you practice self-arrest, the more confident you will become in your ability to use an ice axe to stop a fall.
What safety precautions should I take when using an ice axe?
Using an ice axe can be a fun and exciting activity, but it also requires careful attention to safety. Here are some safety precautions to take when using an ice axe:
- Choose the right ice axe: Select an ice axe that is appropriate for the terrain and conditions you will be facing. A general-purpose ice axe with a pick and adze will work for most situations, but you may need a different type of ice axe for steep terrain or crevasse rescue.
- Learn proper technique: Before using an ice axe, take the time to learn proper technique. This includes understanding how to properly plant the pick, use the adze for self-arrest, and perform other essential techniques.
- Wear appropriate clothing and gear: Make sure you are wearing appropriate clothing and gear for the conditions you will be facing. This includes sturdy boots, crampons, and a helmet.
- Be aware of your surroundings: Always be aware of your surroundings and the conditions you are facing. Look out for crevasses, cornices, and other hazards that could pose a danger.
- Use caution when belaying: If you are belaying someone, use caution to avoid getting tangled in the rope or being hit by falling debris.
- Know your limits: Remember to stay within your limits and not push yourself too hard. If you are tired or feeling weak, it is best to turn back.
- Take regular breaks: Take regular breaks to rest and hydrate. Dehydration can impair your judgment and make it harder to focus, so make sure to drink plenty of water.
- Stay with your partner: If you are climbing with a partner, make sure to stay within sight and earshot at all times. This will help you stay aware of each other’s movements and be able to provide assistance if needed.
By following these safety precautions, you can minimize the risks associated with using an ice axe and have a safe and enjoyable outdoor experience.
How do I care for and maintain my ice axe?
Maintaining your ice axe is crucial to ensure its longevity and functionality. Here are some tips on how to care for and maintain your ice axe:
- Regular Inspection: Before each use, inspect your ice axe for any signs of damage or wear and tear. Check the handle, shaft, pick, and spike for any cracks, bends, or other damage.
- Cleaning: After each use, clean your ice axe with a soft cloth or brush to remove any dirt, snow, or ice buildup. If your ice axe has a metal spike, use a brush specifically designed for metal to avoid scratching the surface.
- Lubrication: Applying lubricant to the pivot points of your ice axe can help reduce friction and make it easier to use. Use a lubricant specifically designed for outdoor gear, such as Teflon-based lubricants.
- Storage: When not in use, store your ice axe in a safe and dry place. Avoid storing your ice axe in direct sunlight or in areas with high humidity, as this can cause damage to the handle or metal components.
- Sharpening: If your ice axe’s pick or spike becomes dull, it’s important to sharpen them to maintain their effectiveness. Use a diamond file or other sharpening tool specifically designed for ice axes to keep the pick and spike sharp.
By following these tips, you can ensure that your ice axe remains in good condition and ready for your next outdoor adventure.
FAQs
1. What is an ice axe?
An ice axe is a specialized tool used by mountaineers, climbers, and skiers for various purposes such as anchoring, supporting themselves, and for self-arrest. It has a sharp pick at one end and an adze or hammer head at the other end.
2. When should I use an ice axe?
You should use an ice axe when you are in snow or ice terrain, and you need to anchor yourself, arrest a fall, or protect yourself from falling. This includes climbing steep slopes, crossing glaciers, or traversing crevasses.
3. How do I choose the right ice axe for me?
Choosing the right ice axe depends on the type of terrain you will be in and the type of climbing or skiing you will be doing. Generally, there are two types of ice axes: simple walking axes and technical axes. Walking axes are for general snow and ice travel, while technical axes have a pick and a more aggressive adze for steeper and more challenging terrain.
4. How do I properly use an ice axe for self-arrest?
To properly use an ice axe for self-arrest, first dig the pick into the snow and place it vertically, with the head of the axe facing downhill. Then, brace the adze against the snow and step down on it with your uphill foot, while pulling the uphill arm of the axe towards your body. Keep your downhill hand on the shaft and your uphill hand on the adze.
5. How do I properly belay with an ice axe?
To properly belay with an ice axe, first dig the pick into the snow and place it vertically, with the head of the axe facing downhill. Then, brace the adze against the snow and tie the rope to your uphill foot. As your partner climbs, pay out rope from your belay loop and hold the rope with your uphill hand. When your partner falls, hold the rope with both hands and apply pressure to the adze to create friction and stop the fall.
6. Can I use an ice axe for hiking on trails?
While an ice axe can be used for hiking on trails, it is not recommended. Hiking boots or trail running shoes are generally sufficient for most hiking and trail running, and using an ice axe on trails can be dangerous, as it may cause you to slip or lose your balance.
7. How do I carry my ice axe while hiking?
To carry your ice axe while hiking, store it in the backcountry, or on ski tours, you can attach it to your pack using a pick and axe holder. Make sure the pick is pointing down and the axe is secured to prevent it from swinging or hitting your pack. If you are carrying a single axe, you can store it in the basket of your pack or attach it to the front of your pack with a carabiner.
8. Can I use an ice axe for skiing?
Yes, an ice axe can be used for skiing, especially in steep or variable snow conditions. When skiing, you can use the axe to balance yourself, to help arrest a fall, or to traverse across the snow. However, it is important to remember that skiing with an ice axe requires additional skills and knowledge, and you should always use caution and ski within your ability level.


