Mountaineering is an exhilarating and challenging sport that requires careful planning and preparation. One of the most critical aspects of any mountaineering trip is packing your backpack. It can be a daunting task to fit all the necessary gear, clothing, and supplies into a single bag, but with the right techniques and tricks, it can be done efficiently and effectively. In this guide, we will explore the best practices for packing a mountaineering backpack, including tips for optimizing weight distribution, organizing gear, and preparing for contingencies. Whether you’re a seasoned mountaineer or a beginner, this guide will provide you with the knowledge and skills you need to pack your backpack like a pro.
Planning Your Climb: Gear Selection and Backpack Choice
Factors to Consider When Choosing a Backpack
When selecting a backpack for mountaineering, there are several factors to consider. Here are some key elements to keep in mind when making your choice:
- Capacity: The capacity of your backpack should be appropriate for the length and difficulty of your climb. It’s important to consider the weight of your gear, as well as any additional items you may need during your climb.
- Comfort and Fit: A comfortable and well-fitting backpack is essential for a successful climb. Look for a backpack with a padded hip belt and shoulder straps, as well as a suspension system that provides good support and ventilation.
- Durability and Material: A durable backpack is crucial for withstanding the demands of mountaineering. Look for a backpack made from high-quality materials, such as heavy-duty nylon or polyester, with reinforced stitching and strong zippers.
- Features and Organization: Consider the features and organization of the backpack when making your selection. Look for a backpack with multiple compartments and pockets to keep your gear organized and easily accessible. Additionally, consider features such as hydration compatibility, external attachment points, and internal compression straps.
By considering these factors, you can choose a backpack that meets your specific needs and provides optimal performance during your mountaineering adventure.
Gear Checklist: Essential Items for Your Mountaineering Trip
Climbing Hardware
- Ice Axe: A crucial tool for maintaining balance and self-arresting in steep, icy terrain. Choose a pick-axe style for steep ice and a hammer-axe style for general mountaineering purposes.
- Climbing Helmet: Provides protection from falling debris and can be used as an anchor in case of a fall.
- Climbing Carabiners: Used for connecting to anchors, belaying, and rappelling.
- Prusik Loop: Allows for ascending a fixed rope.
- Descender: Used for controlled descent on a rope.
- Belay Device: A device that assists in controlling a climber’s descent or arresting a fall.
- Static Rope: Provides a secure anchor for belaying and rappelling.
Personal Protective Equipment (PPE)
- Mountaineering Boots: Sturdy, waterproof boots that provide ankle support and warmth.
- Gloves: Insulated gloves for cold weather and durable, waterproof gloves for rappelling.
- Down Jacket: Lightweight, packable jacket for insulation in cold weather.
- Shell Jacket: Waterproof, breathable jacket for protection against rain and wind.
- Insulated Pants: Waterproof and insulated pants for protection against cold and wet conditions.
- Base Layer: Moisture-wicking, breathable clothing for temperature regulation.
- Beanie or Hat: Headwear to prevent heat loss and protect against sun exposure.
- Sunglasses: Protective eyewear to shield against sun, wind, and snow.
- Gaiters: Waterproof covers for legs to prevent snow and debris from entering boots.
- Avalanche Beacon: A device that helps locate a buried person in case of an avalanche.
- Avalanche Probe: A tool to help locate an avalanche victim under the snow.
- Shovel: A tool for digging snow pits, building snow walls, and burying debris.
- First Aid Kit: Essential medications, bandages, and supplies for treating injuries.
- Map and Compass: Navigational tools for route planning and navigation.
- Headlamp: A portable, battery-operated light source for navigating in the dark.
- Extra Batteries: Spare batteries for headlamps, radios, and other electronic devices.
- Trekking Poles: Lightweight, adjustable poles that provide support and stability during hiking and climbing.
- Crampons: Footwear attachments for traversing icy or snowy terrain.
- Ice Axe or Ice Tool: A tool for self-arrest and maintaining balance in steep, icy terrain.
- Ski or Snowboard Avalanche Safety Equipment: Equipment required for backcountry skiing or snowboarding, including avalanche beacon, probe, shovel, and ski/snowboard carrying system.
- Water Purification System: Portable water filter or purification tablets for treating water from natural sources.
- Repair Kit: A kit containing materials for fixing equipment, such as webbing, carabiners, slings, and cord.
- Personal Medications: Prescription medications and over-the-counter medications for personal use.
- InReach or Satellite Communicator: A device that allows communication with rescue services in remote areas.
- Emergency Shelter: A compact, lightweight shelter for emergency situations.
- Emergency Food Rations: Non-perishable, high-calorie food items for survival.
- Camera: A portable camera for capturing memories of the climb.
- Portable Speaker: A small, portable speaker for listening to music or podcasts during downtime.
- Extra Clothing: Extra layers of clothing for changing weather conditions or for layering under the sleeping bag.
- Hydration System: A lightweight, portable water container and drinking tube for staying hydrated during the climb.
- Food and Snacks: High-energy, non-perishable food items for sustenance during the climb.
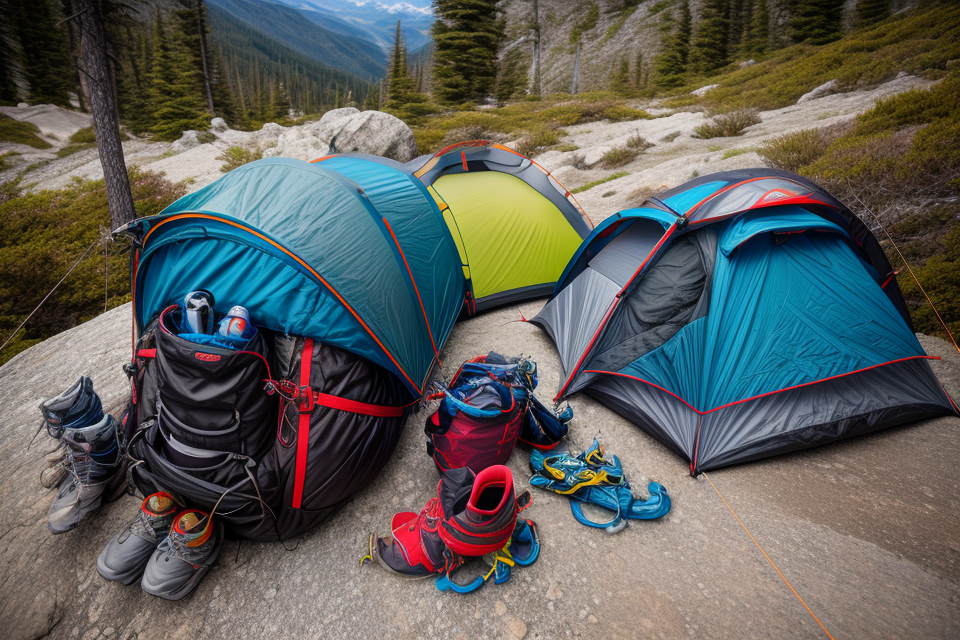
- Tent and Tent Footprint: A lightweight, compact tent for shelter and protection from the elements.
- Sleeping Bag and Sleeping Pad: A rated sleeping bag suitable for the anticipated weather conditions and a lightweight, portable sleeping pad for insulation and comfort.
- Cooking Stove and Fuel: A lightweight, portable stove and fuel for cooking meals during the climb.
- Cookware and Eating Utensils: Lightweight cookware and utensils for preparing and consuming meals.
- Water Filter or Purification System: A portable water filter or purification system for obtaining clean drinking water.
- First Aid Kit: A kit containing essential medications, bandages, and supplies for treating injuries.
- Map and Compass: Tools for navigating and planning the route.
- Trekking Poles: Lightweight, adjustable poles for providing support and stability during hiking and climbing.
- Sunglasses: Protective eyewear for shielding against sun, wind, and snow.
- Sunscreen and Lip Balm: Preventative measures for sun and cold exposure.
- Extra Camera Batteries: Spare batteries for the camera.
- Chargers and Power Bank: Chargers and power bank for electronic devices.
- Portable Speaker: A small, portable speaker for entertainment during downtime.
- Towel: A lightweight, quick-drying towel for personal hygiene.
- Hand Sanitizer and Wet Wipes: Hygiene products for maintaining cleanliness.
- Insect Repellent and Sunscreen: Preventative measures against insects and sun exposure.
- Personal Medications: Prescription and
Backpacking Techniques for Mountaineering
Loading Your Backpack
Frontloading vs. Toploading
When it comes to loading your backpack for mountaineering, there are two main methods: frontloading and toploading. Frontloading involves placing heavy items like your tent, sleeping bag, and other bulky gear at the bottom of your pack, with lighter items like clothing and food on top. This method allows for easy access to your gear and keeps the weight close to your body for better balance.
Toploading, on the other hand, involves placing lighter items on top of your pack, with heavier items at the bottom. This method can make it easier to quickly grab items you need, but it can also make it more difficult to maintain balance, especially when the pack is full.
Weight Distribution and Balance
Regardless of which loading method you choose, it’s essential to distribute the weight evenly across your backpack to prevent strain on your back and shoulders. This can be achieved by placing heavier items close to your back, and using external frames or suspension systems to help transfer the weight away from your shoulders.
Additionally, it’s important to ensure that your backpack is the right size for your body type and the amount of gear you’re carrying. An oversized pack can cause you to shift your weight to one side, while a pack that’s too small can make it difficult to fit all your gear.
Adjusting the Pack for Optimal Comfort
To ensure optimal comfort while wearing your backpack, it’s important to adjust the straps and hip belt to fit your body type. This can help distribute the weight evenly and prevent chafing or discomfort. Additionally, wearing the right type of clothing can help keep you warm and dry, and can make it easier to regulate your body temperature during your climb.
Overall, the key to loading your backpack for mountaineering is to distribute the weight evenly and ensure that your pack is the right size for your body type and the amount of gear you’re carrying. By following these tips, you can ensure that your backpack is comfortable and easy to carry, even in the most challenging climbing conditions.
Packing Techniques for Different Climbing Conditions
Climbing conditions play a crucial role in determining the type of gear and packing techniques to be used when backpacking for mountaineering. The following are some of the packing techniques for different climbing conditions:
Alpine Climbing
Alpine climbing is characterized by steep terrain, exposure, and varying weather conditions. The packing technique for alpine climbing involves carrying a smaller and lighter backpack, focusing on essentials only. This means leaving behind non-essential gear such as camping stoves, cookware, and tents. The pack should be well-organized, with items easily accessible and well-secured to prevent shifting during the climb. Climbers should also consider carrying a rope bag, which is a separate bag for carrying the climbing rope.
Ice Climbing
Ice climbing requires specific gear and techniques for ascending ice and snow. The packing technique for ice climbing involves carrying a heavier pack with additional gear such as ice axes, crampons, and ice screws. The pack should be well-organized with easy access to the essential gear, such as ice tools and crampons. Ice climbers should also consider carrying a picket bag, which is a separate bag for carrying ice protection equipment.
Snow and Winter Climbing
Snow and winter climbing require specific gear and techniques for climbing in snowy and icy conditions. The packing technique for snow and winter climbing involves carrying a pack with additional gear such as avalanche beacons, shovels, and probes. The pack should be well-organized with easy access to the essential gear, such as avalanche beacons and snow shovels. Snow climbers should also consider carrying a snow stake bag, which is a separate bag for carrying snow protection equipment.
Technical Climbing
Technical climbing involves the use of specialized gear and techniques for climbing challenging terrain. The packing technique for technical climbing involves carrying a pack with additional gear such as nuts, hexes, and camming devices. The pack should be well-organized with easy access to the essential gear, such as nuts and hexes. Technical climbers should also consider carrying a rack bag, which is a separate bag for carrying climbing protection equipment.
In conclusion, packing techniques for different climbing conditions are crucial for optimizing performance when backpacking for mountaineering. Climbers should consider the specific gear and techniques required for each climbing condition and pack accordingly. A well-organized and well-secured pack can make a significant difference in a climber’s performance and safety on the mountain.
Tips for Efficient and Comfortable Carry
Adjusting Your Backpack for Different Terrain
Proper adjustment of your backpack is crucial to ensure comfortable and efficient carrying during mountaineering. Here are some tips for adjusting your backpack for different terrain:
- Uphill vs. Downhill Hiking: When hiking uphill, it’s important to distribute the weight of your backpack evenly to prevent strain on your back. This can be achieved by wearing a hip belt, which helps transfer the weight from your shoulders to your hips. When hiking downhill, it’s important to loosen the hip belt and ensure that the backpack is not bouncing excessively, as this can cause discomfort and potential damage to the contents.
- Traversing and Crossing Rough Ground: When traversing or crossing rough ground, it’s important to adjust your backpack so that it doesn’t interfere with your movement. This can be achieved by wearing a waist belt or a chest strap, which helps keep the backpack in place and prevent it from swinging excessively. It’s also important to ensure that the backpack is not too heavy, as this can make it difficult to navigate through rough terrain.
- Navigating Technical Terrain: When navigating technical terrain, such as steep inclines or declines, it’s important to adjust your backpack so that it doesn’t impede your movement. This can be achieved by wearing a waist belt or a chest strap, which helps keep the backpack in place and prevent it from swinging excessively. It’s also important to ensure that the backpack is not too heavy, as this can make it difficult to navigate through technical terrain. Additionally, it’s important to ensure that the backpack is secured to your body, as this can prevent it from getting caught on rocks or other obstacles.
Hydration and Nutrition Strategies
Staying Hydrated During Long Climbs
Hydration is critical during long climbs, as it helps regulate body temperature, maintain blood volume, and protect your joints. Here are some tips to help you stay hydrated:
- Drink plenty of water before, during, and after your climb. Aim to drink at least 2-3 liters of water per day.
- Carry a water filter or purification tablets to ensure that you have access to clean drinking water.
- Use a hydration bladder or water bottles with insulated sleeves to keep your water cold.
- Eat foods that are high in water content, such as fruits and vegetables, to help maintain hydration.
Nutrition for Endurance and Energy
Proper nutrition is essential for maintaining energy levels and endurance during long climbs. Here are some tips to help you fuel your body:
- Bring high-energy, easy-to-digest foods such as energy gels, bars, and trail mix.
- Pack snacks that are rich in carbohydrates and protein, such as nuts, seeds, and dried fruit.
- Drink a sports drink or coconut water to replace electrolytes lost through sweat.
- Consider bringing a hot drink such as tea or soup to help warm up on cold climbs.
Dealing with Altitude Sickness
Altitude sickness can be a common problem for mountaineers, especially those climbing at high altitudes. Here are some tips to help you deal with altitude sickness:
- Drink plenty of water and avoid alcohol and cigarettes.
- Rest and acclimatize gradually, allowing your body to adjust to the altitude.
- Take medication such as Diamox to help alleviate symptoms of altitude sickness.
- Use supplemental oxygen if necessary, and descend if symptoms worsen.
Safety and Emergency Preparedness
Basic First Aid Kit for Mountaineering
When packing your mountaineering backpack, it’s crucial to include a basic first aid kit. This kit should contain essential items that can help you treat injuries, prevent and manage altitude sickness, and deal with hypothermia and frostbite. Here are some items to consider including in your kit:
- Adhesive bandages: These are essential for treating minor cuts and bruises. Make sure to pack a variety of sizes to accommodate different types of injuries.
- Gauze: Gauze is useful for packing wounds and can also be used as a makeshift tourniquet in emergency situations.
- Tweezers: Tweezers are essential for removing splinters, ticks, and other foreign objects from wounds.
- Antiseptic wipes: Antiseptic wipes are useful for cleaning wounds before bandaging them.
- Pain relievers: Pain relievers such as aspirin or ibuprofen can help alleviate pain and reduce inflammation.
- Epinephrine injector: If you have a known allergy, it’s essential to carry an epinephrine injector in case of an emergency.
- Vomit bags: In case of motion sickness or altitude sickness, vomit bags can be a lifesaver.
- Oxygen tank: If you’re climbing at high altitudes, it’s a good idea to bring an oxygen tank as a precaution.
- Whistle: A whistle can be used to signal for help in emergency situations.
- Personal information card: Include a personal information card with your name, medical history, allergies, and emergency contact information.
It’s important to note that this is just a basic first aid kit, and you may need to customize it based on your specific needs and the length of your trip. It’s also important to check the expiration dates of all items in your kit and replace them as needed.
Emergency Shelter and Signaling
When embarking on a mountaineering adventure, it’s crucial to be prepared for any unforeseen circumstances that may arise. Having a well-stocked emergency shelter and signaling kit can mean the difference between a minor inconvenience and a life-threatening situation. In this section, we’ll discuss the essential items to include in your emergency shelter and signaling kit, as well as some tips for creating a safe haven in case of an emergency.
Creating a Safe Haven in Case of an Emergency
When faced with an emergency situation while mountaineering, it’s important to have a safe haven to retreat to. This could be a simple snow cave, a rock overhang, or even a well-placed tent. The key is to find a location that provides protection from the elements and is easily accessible.
Here are some tips for creating a safe haven in case of an emergency:
- Look for natural features such as rock overhangs, caves, or tree wells that can provide shelter from the elements.
- Create a snow cave or snow shelter if necessary. This can be done by digging a trench in the snow and creating a small space to huddle together.
- Use your backpack as a pillow or padding to create a more comfortable sleeping area.
- Make sure your shelter is far enough away from any potential avalanche zones or other hazards.
Signaling for Help with Whistle, Mirror, or Flares
In the event of an emergency, it’s important to have a way to signal for help. This could be due to an injury, a lost hiker, or any other number of situations. Here are some essential items to include in your emergency signaling kit:
- Whistle: A whistle is a small, inexpensive item that can be heard from a great distance. It’s important to have a whistle on hand in case you need to signal for help.
- Mirror: A mirror can be used to reflect sunlight and signal for help from a great distance. This is especially useful in snowy or icy environments where other forms of signaling may not be effective.
- Flares: Flares are a powerful way to signal for help at night or in low-light conditions. They can be seen from a great distance and are an essential item to include in your emergency signaling kit.
By including these items in your emergency shelter and signaling kit, you’ll be better prepared to handle any unexpected situations that may arise while mountaineering. Remember to always be prepared and to stay safe on your adventures.
FAQs
1. What should I consider when packing a mountaineering backpack?
When packing a mountaineering backpack, consider the weight of the items you’ll be carrying, the terrain you’ll be hiking on, and the weather conditions you’ll be facing. You should aim to pack light, but also bring essential items such as shelter, warm clothing, and a first aid kit.
2. How should I organize the items in my backpack?
You should organize the items in your backpack so that they are easily accessible and can be quickly retrieved when needed. Consider placing frequently used items such as a map, compass, and headlamp in easily reachable pockets. It’s also a good idea to pack items based on their use, with items for the trail separated from items for camp.
3. How should I pack my sleeping bag and tent?
Your sleeping bag and tent should be packed at the bottom of your backpack, with other heavy items such as your stove and cooking pot placed on top. This will help distribute the weight of the items evenly and prevent them from shifting during hikes. Be sure to secure the tent and sleeping bag to the outside of the backpack with straps or loops to prevent them from getting damaged.
4. How much water should I carry?
The amount of water you should carry depends on the length of your hike and the availability of water sources along the way. As a general rule, it’s a good idea to carry at least one liter of water per hour of hiking, and more if you’re hiking in hot or dry conditions. It’s also a good idea to bring a water filter or purification tablets in case you need to refill your water bottles from natural sources.
5. How should I pack my food?
You should pack your food in a way that is easy to access and protects it from crushing or breakage. Consider using a separate food bag or container to keep your food separate from the rest of your gear. It’s also a good idea to bring a variety of high-energy, non-perishable foods such as trail mix, energy bars, and dried fruits.


